An Overview of Affordable Digital Integration for Public Art Programs
Public art has a way of transforming a neighborhood, but once the paint dries, the connection between the artist and the community often becomes static. Most arts organizations and city planners want to bridge this gap with technology but assume that "mural activations" require a five-figure tech budget and a dedicated IT department.
The reality of modern public art management is much more accessible. You do not need a massive grant to turn a physical wall into a digital experience. By using simple, durable smart plaques, you can provide visitors with artist interviews, performing art experiences, and neighborhood history for a fraction of the cost of a traditional plaque.
The following guide outlines how to launch your own interactive public art map using a "start small, scale fast" philosophy that respects your budget.
Understand the Mural Activation Concept
A mural activation is the process of adding a digital layer to a physical piece of street art. This allows a viewer to interact with the wall using their smartphone to unlock content that isn't visible to the naked eye.
When you activate a mural, you provide context. You might feature a video of @osirisrain discussing the inspiration behind a portrait or a gallery of behind-the-scenes photos from @aylo_nomad. This turns a passive viewing experience into an active learning moment.
tip: Think of your digital content as the "Director's Commentary" for your city's walls.
Step 1: Choose Your First Location
You do not need to launch a city-wide trail on day one. In fact, starting with a single, high-traffic mural is the most effective way to test community engagement.
- Identify a mural in a walkable area with consistent foot traffic.
- Select an artwork that has a compelling story or a well-known local artist like @_emilyding or @kev_scraps14.
- Ensure the surface is suitable for a small, permanent plaque installation.
- Verify that the area has decent cellular reception so users can access the digital content.
Starting with one location keeps your initial investment at exactly $60. There are no minimum orders, which allows you to prove the concept to your stakeholders before committing to a larger project.
Step 2: Select Dual-Technology Hardware
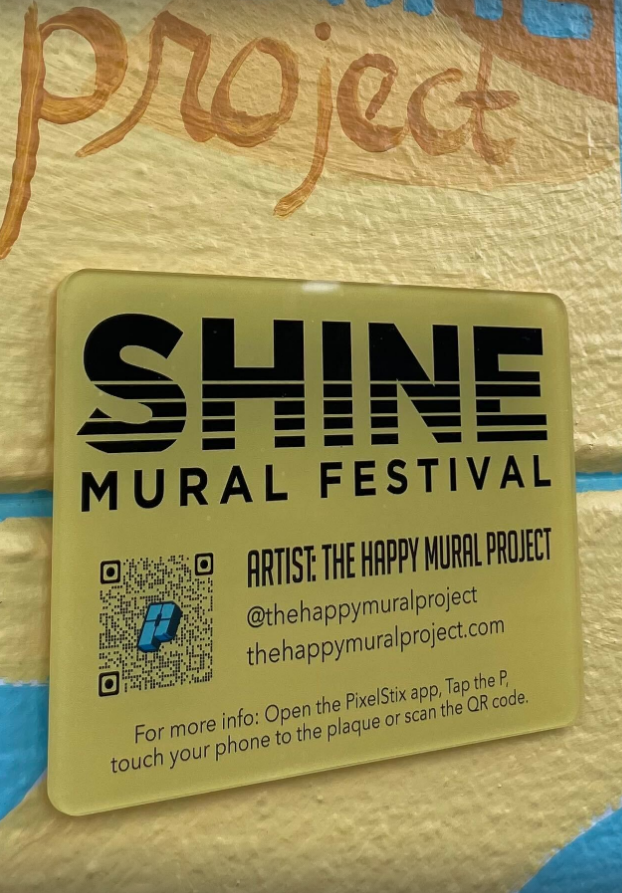
The most common mistake in public art tech is choosing between a QR code and NFC. Both have strengths and weaknesses, which is why a dual-technology plaque is essential for a professional experience.
The qr code plaque is universally recognized. Almost everyone knows how to open their camera and scan a code. However, QR codes can be difficult to scan in low light or at certain angles.
The nfc plaque (Near Field Communication) offers a more "premium" feel. It allows users to simply tap their phone against the plaque to trigger the content, similar to how Apple Pay or Google Pay works.
- Purchase a PixelStix Smart Plaque that includes both NFC and QR.
- Ensure the plaque is weather-resistant and UV-protected to withstand outdoor elements.
- Choose a design that includes clear instructions for the user.
tip: Using both technologies ensures that even users with older phones can still access your mural trail.
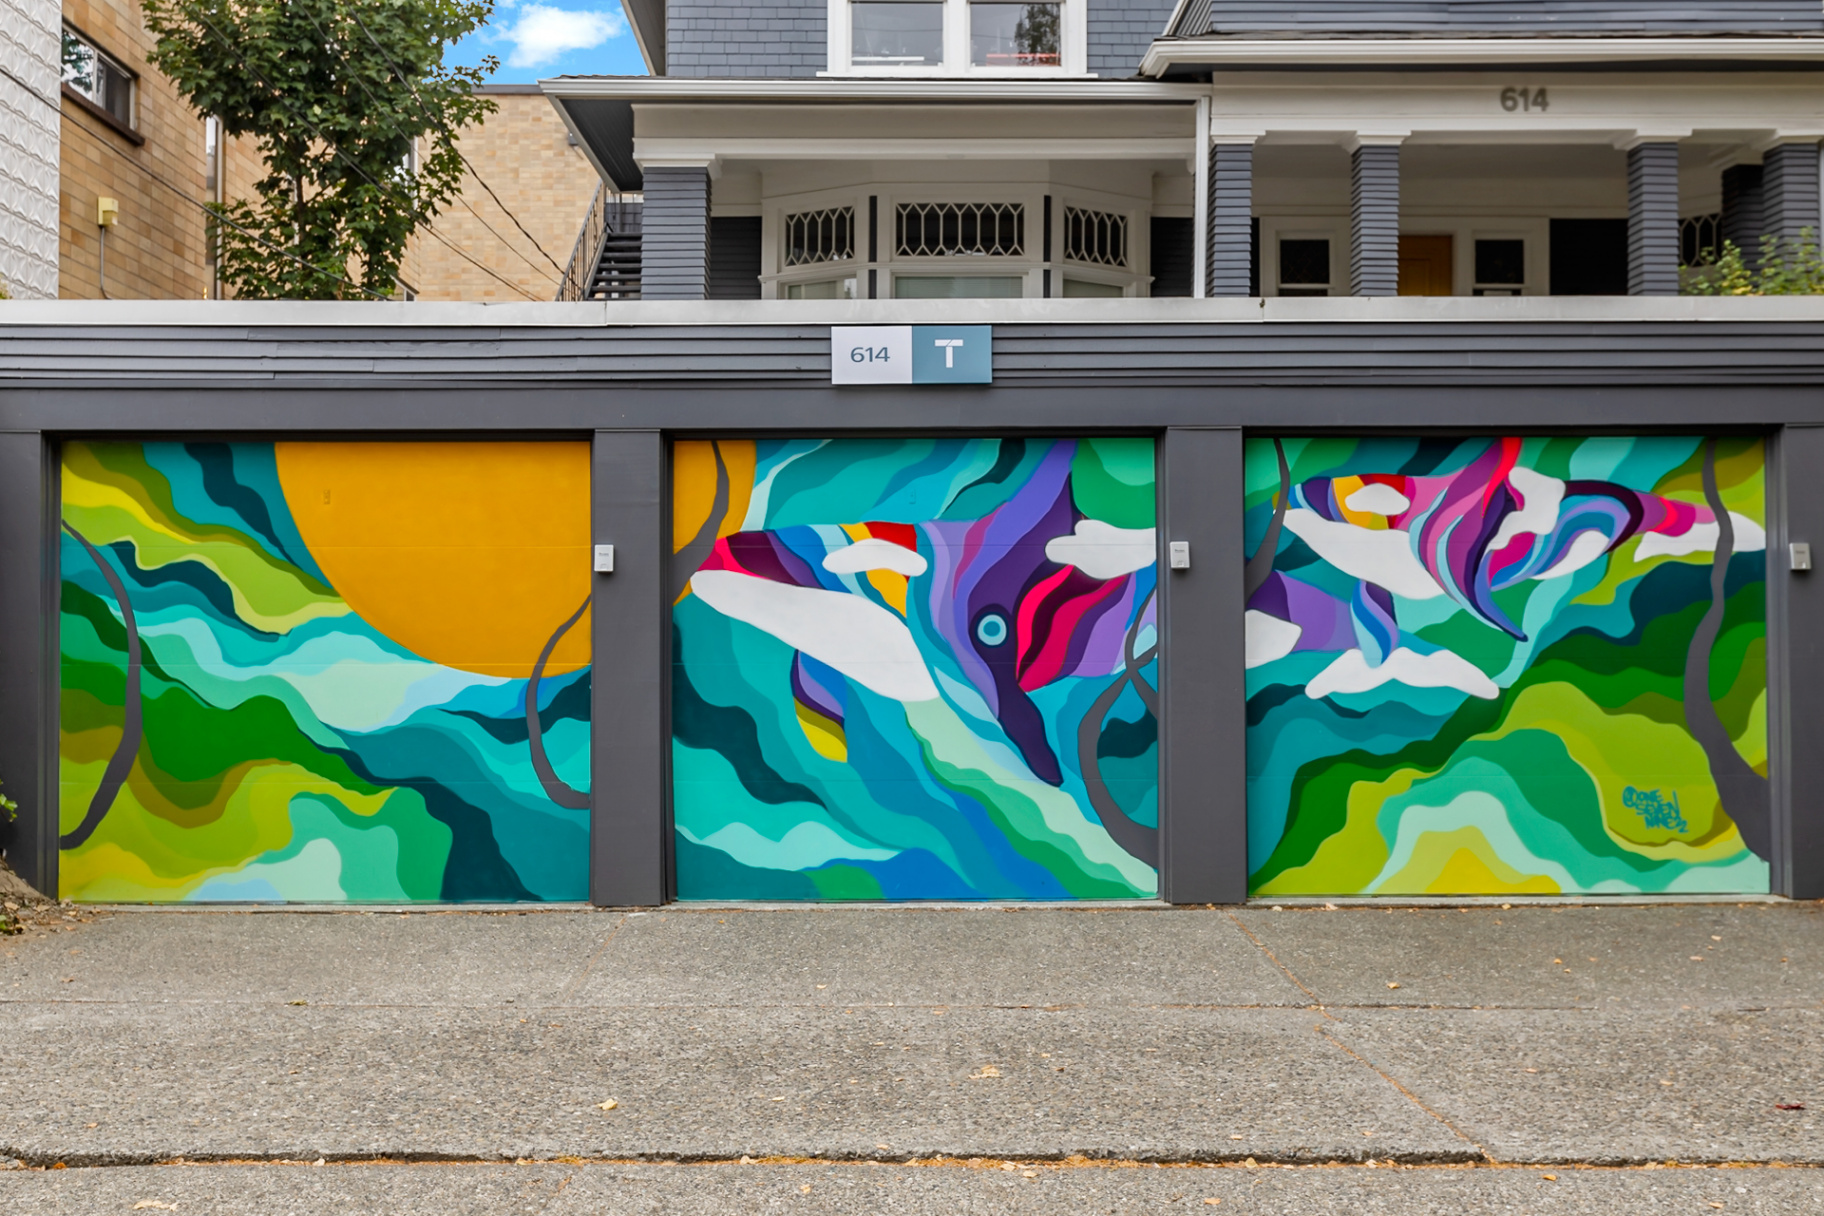
Orca Vibes @onesevennine Seattle, WA
Step 3: Set Up Your Digital Content
Once you have your plaque, you need to decide what the user will see when they scan it. This is where you can get creative without spending a dime.
- Record a short video interview with the artist using a smartphone.
- Collect high-resolution photos of the mural’s progress from start to finish.
- Write a brief biography of the artist and the significance of the mural to the local community.
- Upload these assets to a hosting platform or link directly to the artist’s social media.
The goal is to provide value that the viewer can't get just by looking at the paint. If they scan a plaque and only see a static photo of the mural they are standing in front of, they likely won't scan the next one.
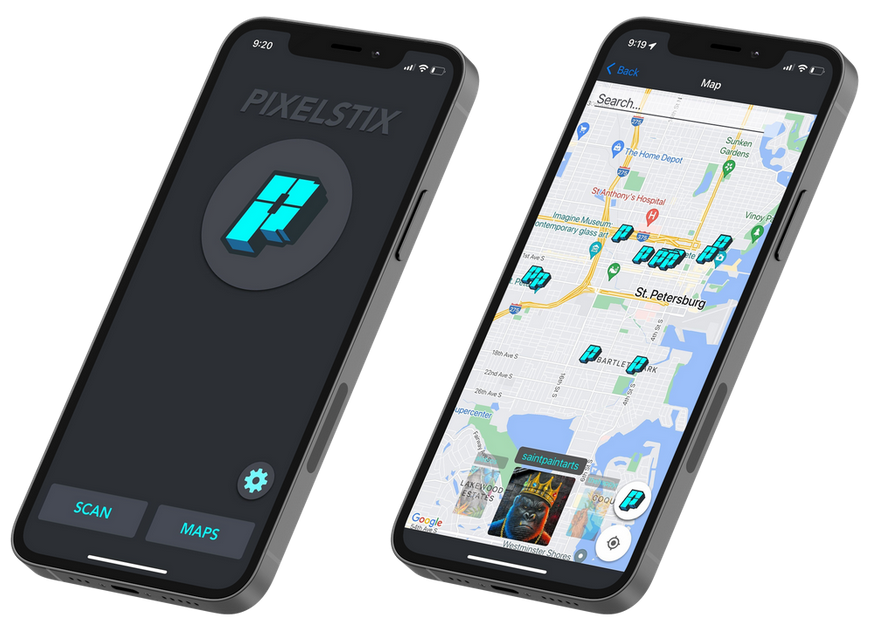
Step 4: Deploy the PixelStix Maps App
To turn individual murals into a cohesive trail, you need a central hub. The PixelStix Maps app serves as a free public art map for your community.
- Register your activated murals within the PixelStix ecosystem.
- Add your murals to the map so users can navigate from one piece to the next.
- Encourage local businesses near the murals to promote the "art walk" to their customers.
When a visitor opens the app, they can see every activated mural in your city. This encourages them to explore areas they might otherwise skip, driving foot traffic to local shops and cafes.
tip: A digital map is much easier (and cheaper) to update than a printed brochure.
Step 5: Install the Plaque
Installation is a straightforward process that requires basic tools. You want the plaque to be visible but not distracting from the artwork itself.
- Clean the surface area where the plaque will be mounted.
- Use the double-sided adhesive that come with our plaques or security screws if needed.
- Mount the plaque at eye level (approximately 5 feet) for maximum accessibility.
- Test the scan and tap functions immediately after installation to ensure everything is working.
By placing the plaque consistently: perhaps in the bottom right corner of every mural: you train your community to look for it. This creates a "habit of engagement" for your regular art walkers.
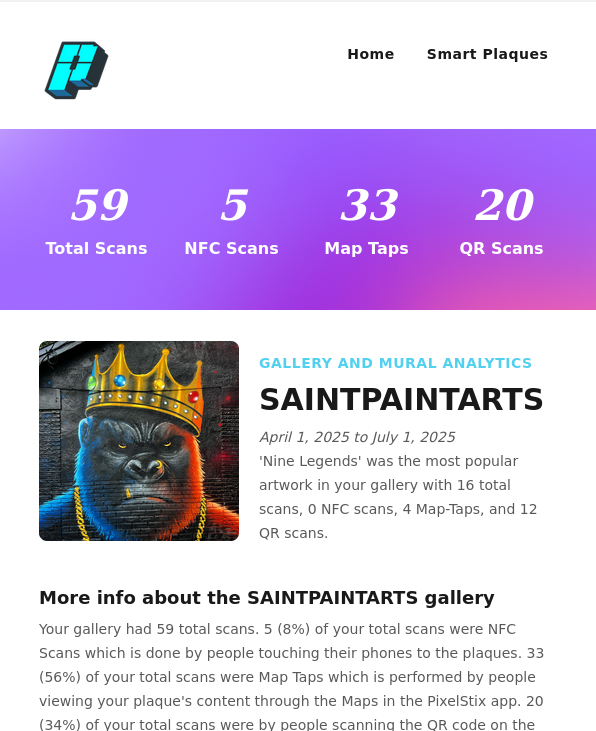
Step 6: Monitor Your Free Analytics
One of the biggest hurdles for arts organizations is proving the ROI of a mural. With digital plaques, you no longer have to guess how many people are looking at your art.
- Check your email for the free monthly analytics report provided by the PixelStix portal.
- Review the number of total scans, unique visitors, and the time of day people are visiting.
- Use this data to show city council or private donors exactly how the community is interacting with the art.
- Identify which murals are the most popular and use that information to plan future installations.
This data-driven approach is powerful for securing future funding. Instead of saying "people like the murals," you can say "this mural received 500 unique interactions this month."
Scaling Your Project
Once you have successfully activated your first few murals and gathered your first few months of data, scaling becomes much easier. Because there is no massive upfront cost, you can add one plaque at a time as your budget allows.
- Use the $50/month admin portal if you decide to manage a large-scale collection with advanced features.
- Partner with local schools to create educational tours using the plaques.
- Invite local historians to record audio clips for a "living history" mural trail.
The "shoestring" approach isn't just about saving money; it's about building a sustainable program. By starting small, you ensure that every dollar spent is backed by community interest and hard data.
Final Thoughts on Accessibility
The beauty of a $60 smart plaque is that it levels the playing field. A small neighborhood association can now offer the same high-tech experience as a major metropolitan museum.
Public art is meant to be for everyone. By using a combination of qr code plaque and nfc plaque technology, you ensure that the stories behind the murals are just as accessible as the art on the walls.
Whether you are working with established names or supporting emerging local talent, the digital layer ensures those artists' voices are heard. Start with one plaque, watch the data come in, and grow your interactive gallery at your own pace.
tip: Don't wait for a major grant. Start with your most popular mural this week.